To add a background to a green screen image in Photoshop you will demand to acquire how to use a few default tools available in the toolbar.
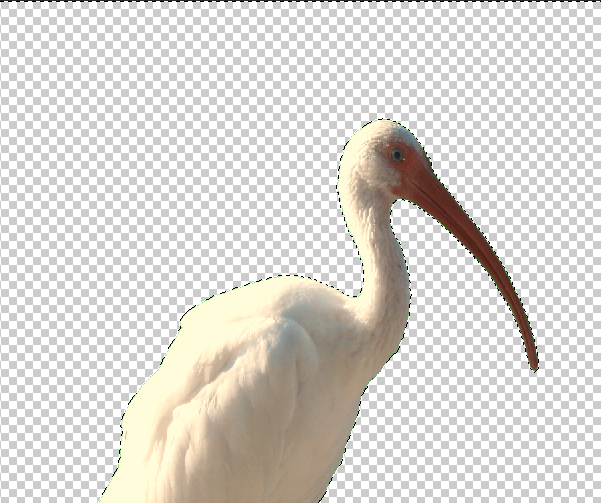
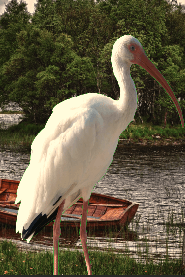
If the background isn't perfectly green or well lit, you'll need to accept a few actress steps. Feel free to try your hand using the example image below.
We'll take you through the easier method first, but afterwards, you can attempt the second method for images that don't take a perfect single dark-green background.

How To Add a Background To a Perfect Light-green Screen Paradigm in Photoshop
For our first section, nosotros will guide you through how to add your own background when the green screen is perfectly lit or a single shade of light-green is used throughout. You tin can find good royalty-free green screen and background images online if you haven't already.
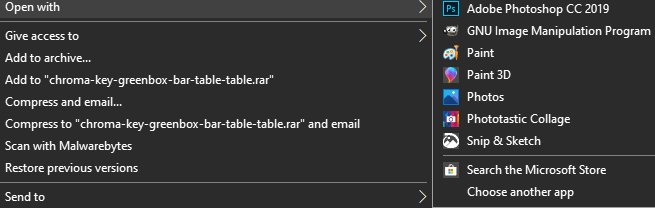
- First, detect your image, right click it and click Open With > Adobe Photoshop.
- In Photoshop, you must right click the layer at the bottom and then click Layer from Background…
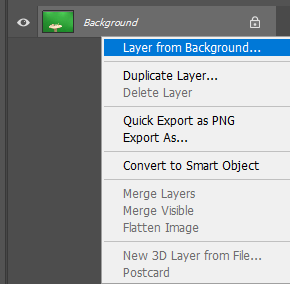
- Click OK when prompted. This volition allow you to edit the paradigm yous've just opened.
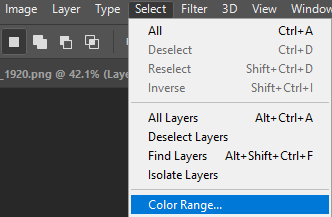
- Side by side, click Select in the peak console and so click Colour Range.
- If the image uses a perfect dark-green screen, you should see the outline of your image in the window that appears. If you practice non see a clear outline, you may want to try the next pace. We still advise you to try this step offset, as information technology'll help y'all to learn crucial tools that can be used later.
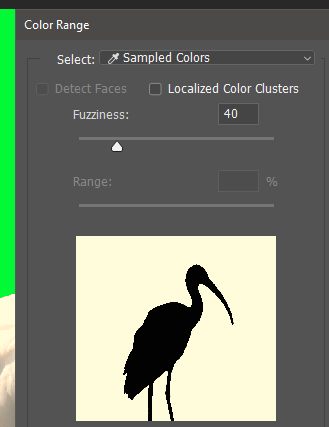
- Next click on the green screen itself and the dropper tool volition pick out that color. After, click OK and the greenish screen area will be highlighted.
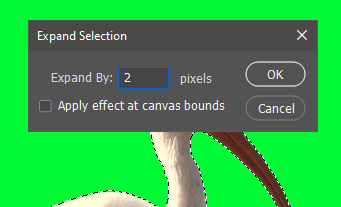
- You must now perform two more steps to ensure your epitome doesn't have a green outline. Click Select and then click Modify > Aggrandize. Choose to expand by ii pixels and and so click OK.
- Next, click Select, then Select and Mask. On the new window that appears on the left, put the plumage size to i px.
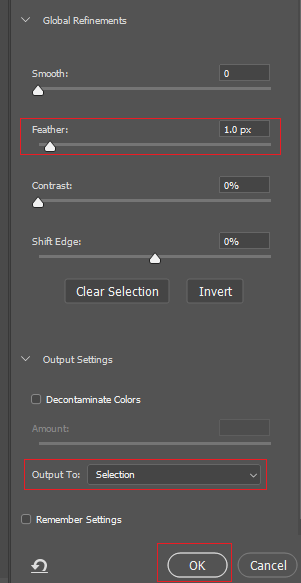
- Click the Output Settings dropdown box and brand sure it is set up to Output To: Selection. Next click OK.
- Printing delete on your keyboard and your green screen will be removed.
The side by side footstep is to get a groundwork image you'd like to use. You can use your own background or anything online. If it's for commercial purposes take a read through our guide on Creative Eatables, which will assist y'all find relevant images for gratis, commercial utilise.
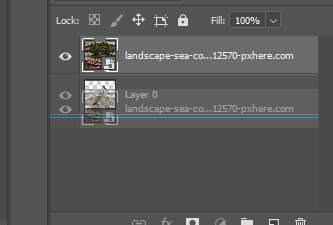
Once y'all have your image, find information technology on your PC and click and drag information technology into your Photoshop window. Yous may need to resize information technology, but later merely press the enter key. Y'all must now elevate the new layer underneath your dark-green screen layer then that information technology appears as the groundwork.
You'll now have your green screen image in Photoshop with a new background. Y'all tin can so export or relieve your prototype as you lot would usually.
How to Add a Background To a Badly Lit Green Screen
Many light-green screen images aren't perfectly lit, which ways cutting out the light-green screen itself can take more than endeavour. You can follow the steps below if you're unable to fully remove the dark-green screen with the steps mentioned above.
- Outset, open your photograph with Photoshop. Next, press L on your keyboard to access the Lasso tool. Click and hold to draw an outline effectually the field of study y'all'd similar to motion to your groundwork. Endeavour to brand it as close equally possible to the subject itself.

- Allow go of the mouse button and you lot'll have a selection effectually your object. Next, right click and click Select Changed.
- Press the Delete key on your keyboard and the surface area effectually your object volition be deleted.
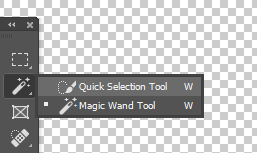
- Adjacent, correct-click the Magic Wand Tool and click the Quick Selection Tool. Use Mouse Gyre Bike Upwardly + Alt to zoom in as close as possible to your subject.
- With the Quick Selection Tool active, utilise Shift + Left Click to highlight areas of your subject, and Alt + Left Click to highlight areas of the greenish screen.

- This process tin can take some time but the goal will be to highlight the entire object. Once completed, printing Ctrl + X and then Ctrl + V.
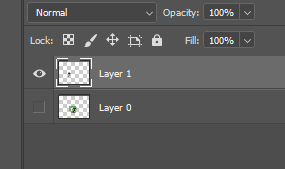
- A new layer will be created, so you lot'll need to hide the previous layer. Click the eye icon next to the layer that contains the green screen. After, find your background epitome in Finder or Windows Explorer and elevate the image into your Photoshop window.
- Drag the groundwork layer nether the green screen layer and you'll accept completed your task.

Note that some images won't accept perfect results – the lower quality the dark-green screen image in Photoshop, the more effort and intendance you'll need to take to cut out whatsoever green pixels, and sometimes it'south well-nigh impossible to practise information technology without removing part of the object itself.
Summary
That brings united states to the end of our guide on how to add a background to a green screen image in Photoshop. If you demand more help, yous can exit a comment below.
how to change green screen background in photoshop
Source: https://www.online-tech-tips.com/computer-tips/how-to-add-a-background-to-a-green-screen-image-in-photoshop/
